Under the 'Database' main menu we see the following sub menus
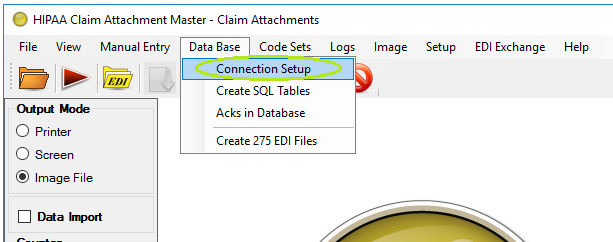
The menu 'Database' and its sub menus
These menus are disabled while the database feature is not licensed.
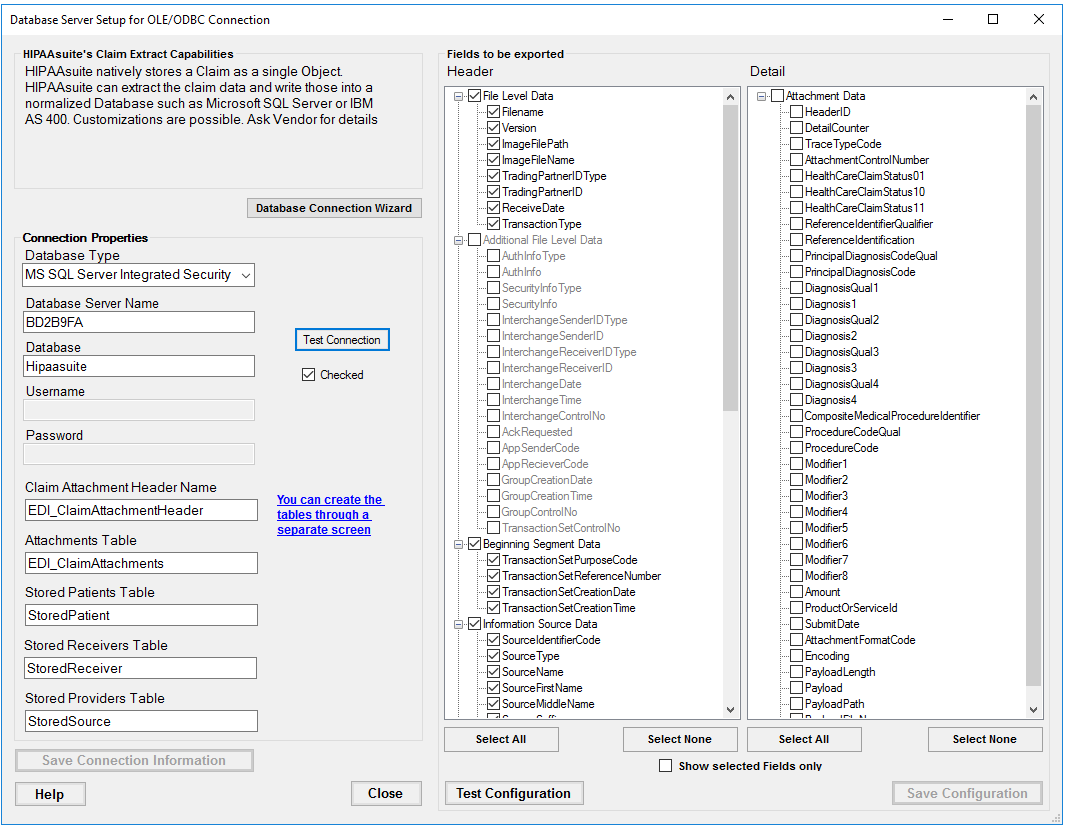
In order to setup the database and its connection and fields we click on 'Connection Setup'. The following screen comes up
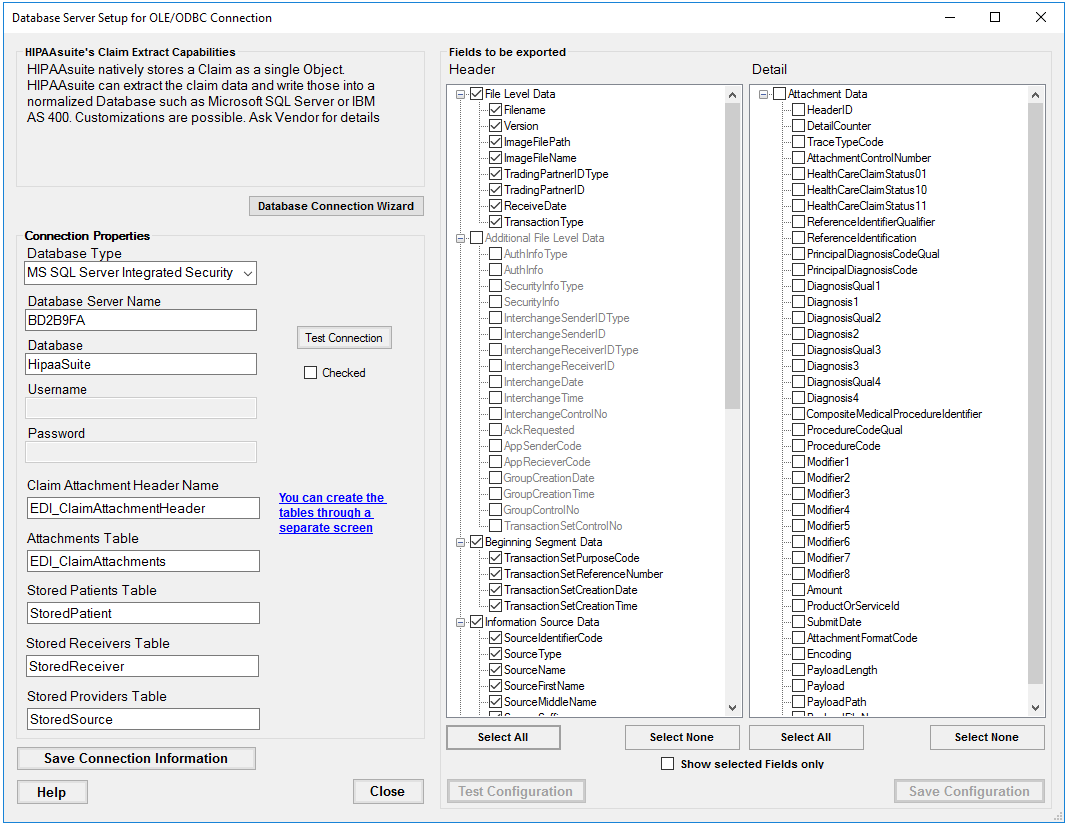
The database connection setup screen
On the left side of the screen we can set and test the database connection while on the right side we list the tables and their fields.
On top we choose the database type and connection mode. At this time the HIPAA Claim Attachment Master supports
| • | Microsoft SQL Server (with Server Authentication) |
| • | Microsoft SQL Server with integrated security |
| • | ODBC connections |
Connection Properties
Tip: If you use ODBC for the connection, you will need to set up the ODBC connection first in the Windows ![]() Control Panel
Control Panel ![]() Administrative Tools
Administrative Tools ![]() Data Sources (ODBC) setup screen. Setting up the ODBC connection varies from database to database.
Data Sources (ODBC) setup screen. Setting up the ODBC connection varies from database to database.
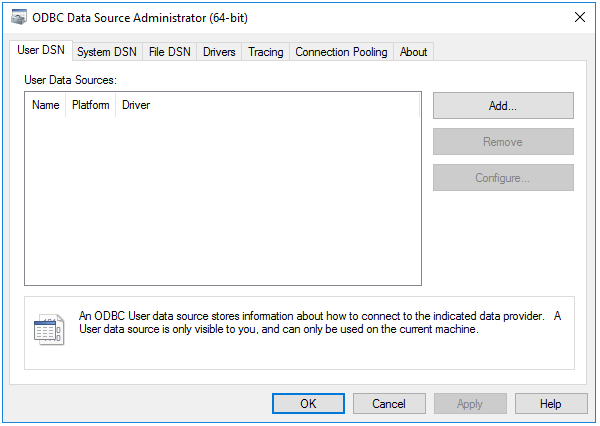
The ODBC Administration screen in Windows
The other fields in the connection setup are:
| • | Database Server Name or DSN — If you use SQL Server, then enter the IP address or the name of the database server. If you use ODBC, then specify the Data Source Name (DSN) that is defined through the ODBC in the Control Panel of Windows. Latest MySQL ODBC driver can be downloaded on http://dev.mysql.com/downloads/connector/odbc/. |
| • | Database — Define the database under the above connection. Typically, this field will be empty for ODBC setup. |
| • | Username — A defined user that has privileges to the database. For Microsoft SQL Server Integrated Security, leave the field empty. |
| • | Password — Enter the user's password. Not required for Microsoft SQL Server Integrated Security. |
Tip: Normally, database, username and password are configured in the Windows Data Sources (ODBC) Manager and are not required to be provided in these fields.
The tables that contain the AttachmentMaster information
| • | Claim Attachment Header Table Name - Enter the name that you give to your Claim header table. The default name is suggested but can be changed. |
| • | Claim Status Detail Table Name - Enter the name of the table that contains the Detailed information. A default name is suggested but can be changed. |
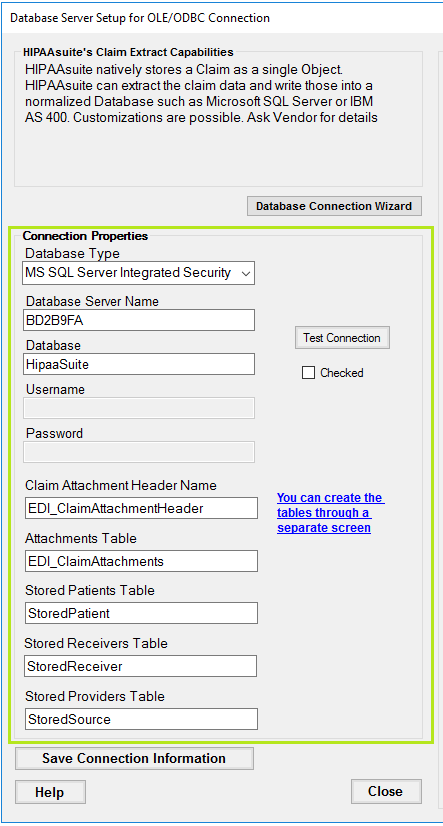
The connection properties fields
Note: Consult Windows Help or the internet on specific data source setups.
To create tables in your database, click on the "You can create the tables through a separate screen" link. For instructions, refer to Creating Tables.
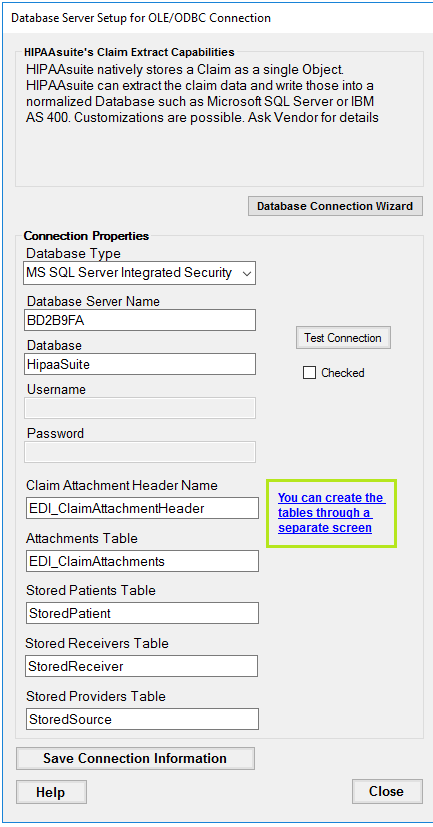
A link to create tables
Once the connection parameters have been entered, click "Save Connection Information."
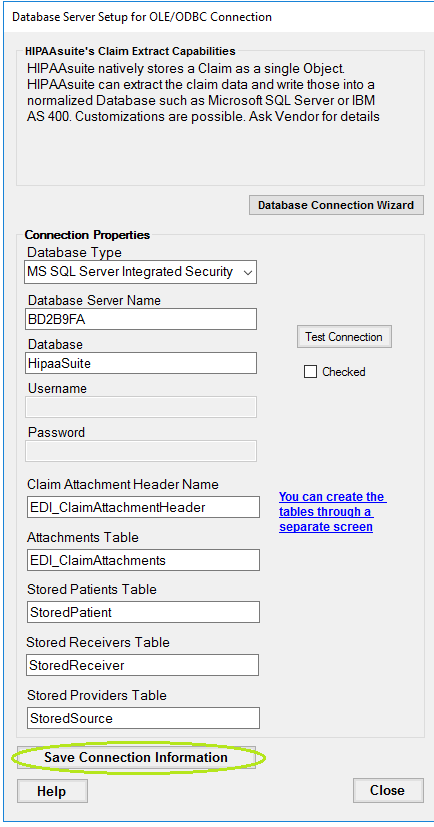
The "Save Connection Information" button
To verify if the entered parameters are correct, click on the "Test Connection" button.
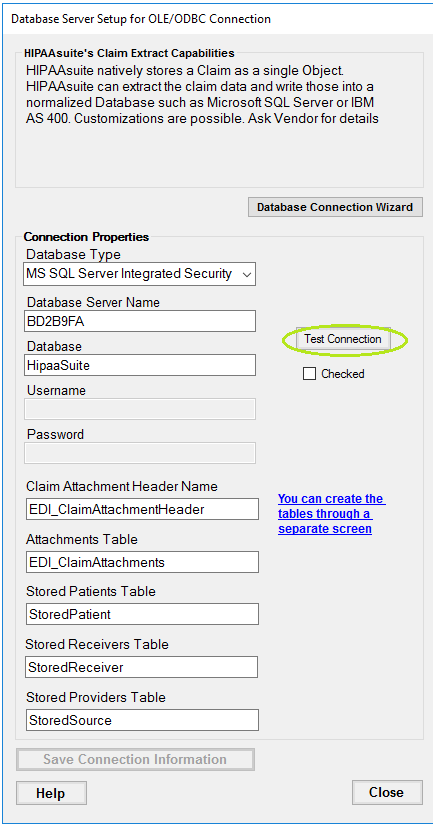
The "Test Connection" button
If you test the connection settings and have not yet created the tables you will see the following message box popping up
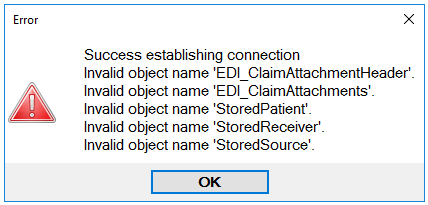
A successful connection check, but unsuccessful table check.
If the test has passed successfully, you will see the required tables listed as verified, as follows:

The success message
Once the test has passed successfully, the "Connection not checked" message changes to "Connection chеcked."
The "Connection checked" check box
If you need to create the tables first, then see Creating Tables.