|
<< Click to Display Table of Contents >> HIPAA Eligibility Responder |
  
|
|
<< Click to Display Table of Contents >> HIPAA Eligibility Responder |
|
In order to receive and respond to ASC X12 005010X279A1 Eligibility and Benefit Requests (270) you must have installed HIPAA Eligibility Responder. Please download and install this software from HIPAAsuite and configure it as follows. The program itself comes with a detailed help documentation. This is a quick start guide.
Database Configuration
First is the Database configuration. This is where transactions will be stored.
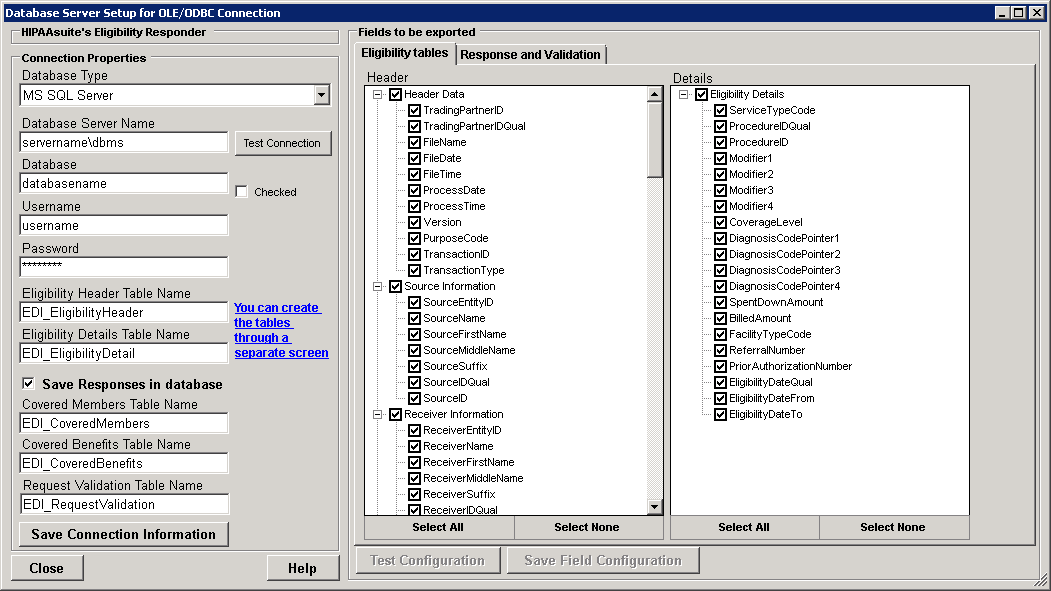
In the Database dropdown menu, select "Connection and Data Fields".
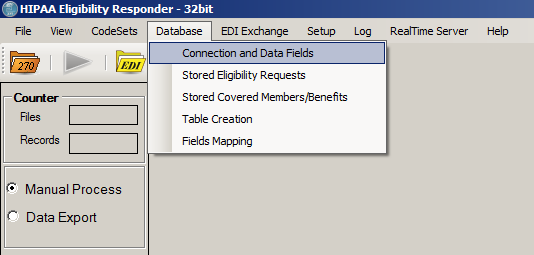
The Database dropdown menu will present options specific to the Database it will be checking for eligibility and patients. The Database Connection and Data Fields option will lead to a form where all necessary Database settings can be configured.
Fill in your database connection details.
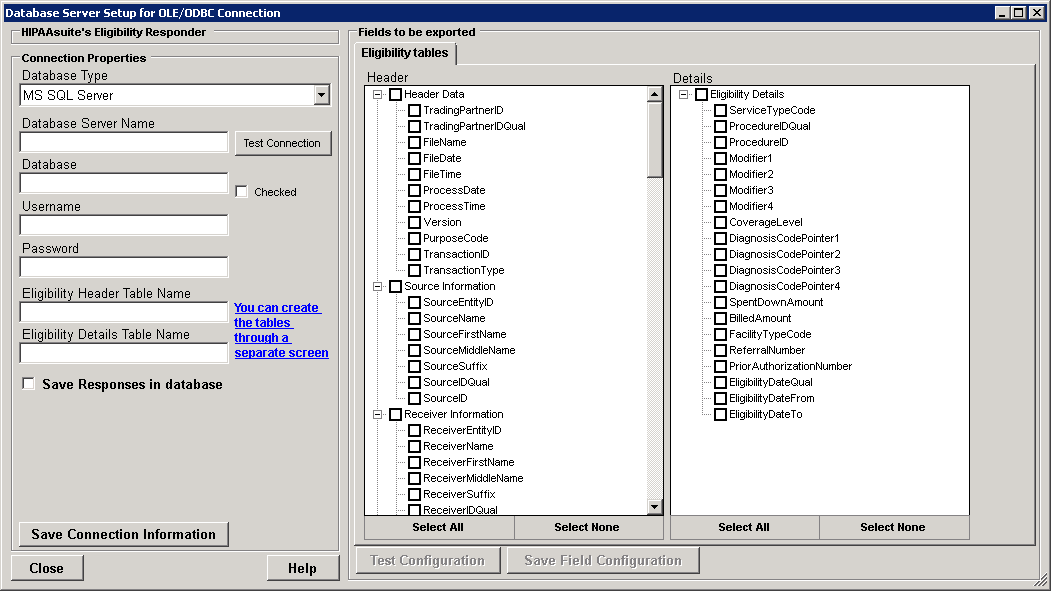
This form stores all necessary Database settings.
Fill all fields and be sure to check "Save Responses in database". This presents additional tables necessary for correct response behavior.
Click the "Test Connection" button to verify your database connection details are correct. If you have not created the database or tables a pop-up message will inform you the database could not be opened or the tables were not found.
If a database does not exist, consult your local Administrator.
If you have not yet created the tables, you may click the blue underlined text "You can create the tables through a separate screen" to open a window that will automatically create them for you.
This text links to the table creator.

Table creation made simple.
Testing your database connection with the "Test Connection" button should now yield the following message:
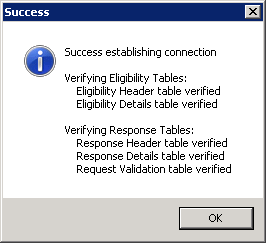
Connection test successful.
All six tables are necessary. If there are any missing tabs, go back to the Database Connection and Data Fields menu and verify "Save Responses in database" under "Connection Properties" is checked.
After creating the tables, the field configuration must be tested. In the Database Connection and Data Fields menu make sure all fields are selected for both tabs. Click the "Select All" button near the bottom of the form to check all fields. Then, click "Test Configuration", and later the "Save Field Configuration" button.
"Select All" buttons near the bottom make field selection quick.
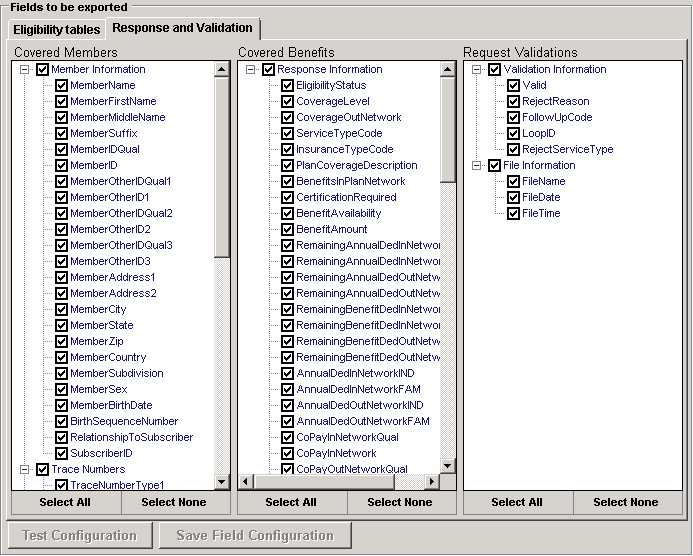
The Response and Validation fields are also necessary.
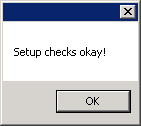
Setup successful.
The Database is now configured and HIPAA Eligibility Responder can generate Eligibility and Benefit responses. Follow the next steps to automate this process.
In the EDI Exchange dropdown menu, select "EDI Exchange Setup".
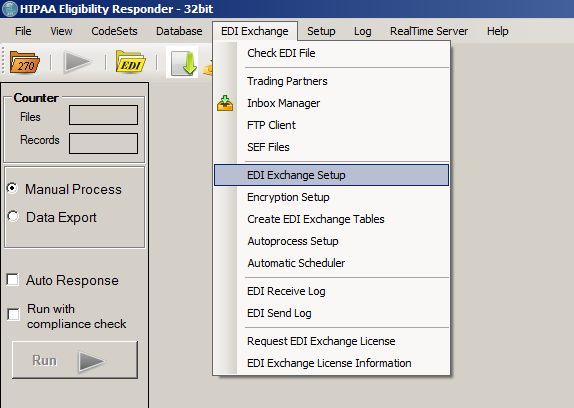
EDI Exchange Setup menu option.
The following window contains all necessary information to initialize EDI Exchange and automate the Eligibility and Benefit request/response process.
Specify your Root Directory Path. This is where all incoming, outgoing, suspended, and rejected 270/271 files will be stored along with their respective acknowledgment EDI files.
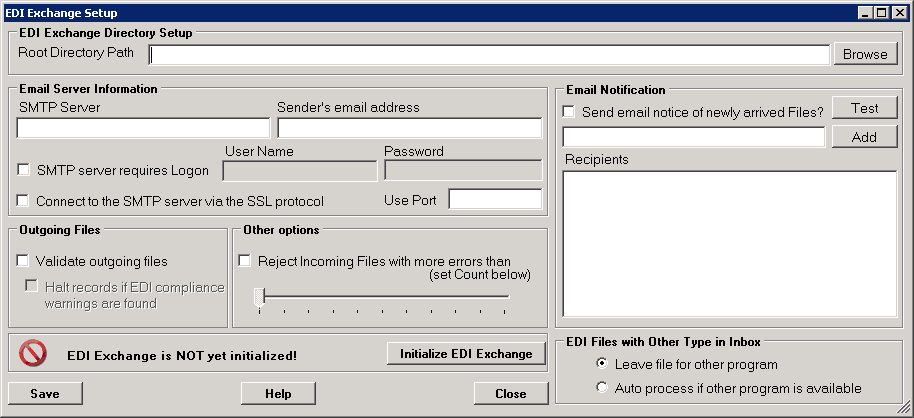
EDI Exchange setup window.
For COREII compliance, bad incoming EDI files must be rejected. Check "Reject Incoming Files..."
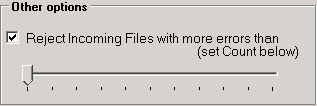
Reject files with errors.
Click "Initialize EDI Exchange". This will check your database connections and create all necessary Inbox subdirectories. Afterward, it should look like this:
![]()
Successful initialization.
Finally, the autoprocessing options need to be set. In the EDI Exchange dropdown menu, select "Autoprocess Setup".

Autoprocess setup menu option.
In the following window, check options "Export in Database" and "Create Autoresponse."
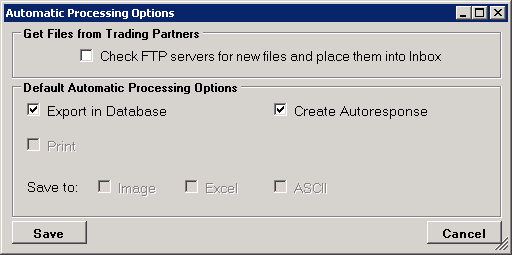
DB Export and Autoresponse checked.
Company Setup
Now, Company Setup needs to be completed. This identifies you in both EDI files and SOAP/MIME message data.
From the Setup drop-down menu, select "Company Setup".
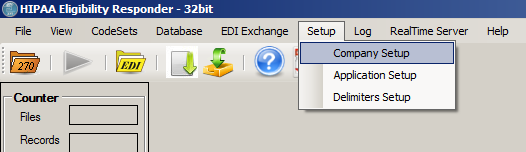
Company Setup menu option.
Fill in the Company Setup form. Set the Production flag in the ISA 14 and 15 section to Production when you are done testing.
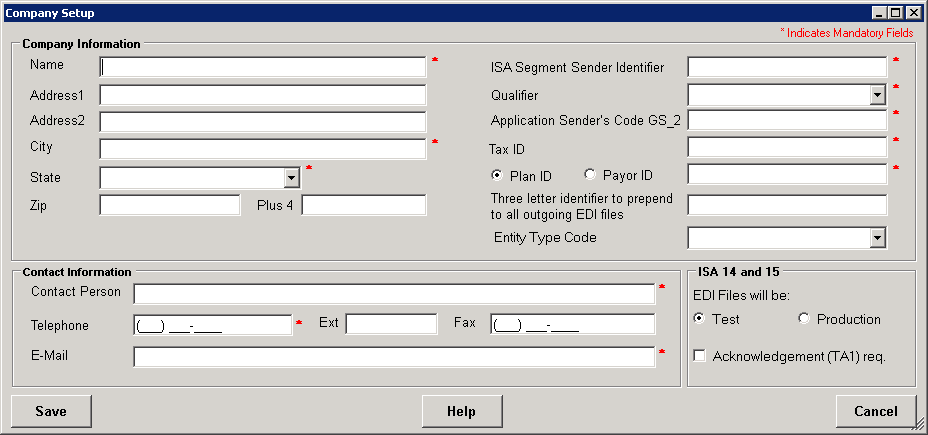
All fields marked with red asterisks are mandatory.