Document Management Systems with image libraries often require some basic information together with the file path to the image. The HIPAA Claim Payment Master can create such an index through ODBC into any database, independent of the database used for file downloads.
Select Image ![]() Image Index File Options in the main menu to access the "Image Index Configuration" window.
Image Index File Options in the main menu to access the "Image Index Configuration" window.
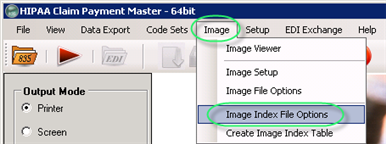
The "Image Index File Options" menu
You can define which fields to include and configure your database settings. Here are all options:
Create Image Index
Check this option to create the image index. Select one of the following options to specify the format:
| • | ASCII Text File — The image Index File is an ASCII text file that can be created together with claim images. It will contain tab-delimited fields and have one line per claim. |
In the "Text File with Image Files Path" field specify the output directory for image index. Click "Browse" to select the destination place.
Note: The image index ASCII file currently works only when you save individual images for each claim.
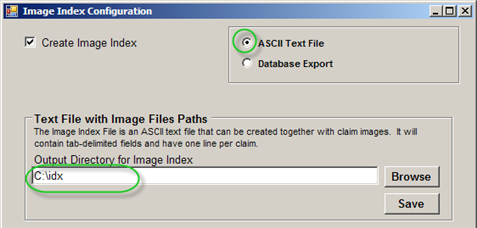
The "ASCII Text File" option
Then click "Save."
| • | Database Export — Select this option to save the image index through ODBC into any database, independent of the database used for file downloads. The database setup is similar to the database setup for the export of claim payment data. Specify the following database connection parameters: |
| • | Database Type |
| • | Database Server Name or DSN |
| • | Database |
| • | Username |
| • | Password |
| • | Image Index Table Name |
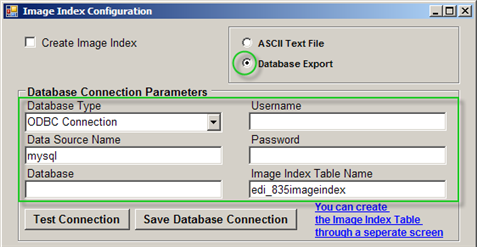
The "Database Export" option
Once all database connection parameters have been specified, click "Test Connection" to verify the connection.
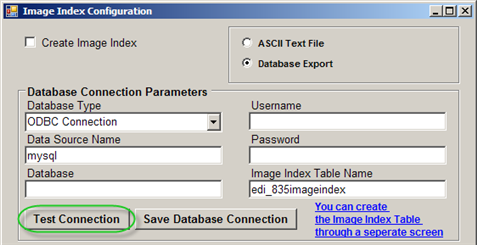
The "Test Connection" button
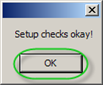
The configuration is correct if you receive a message like this. Click "OK."

The success message
Then click "Save Database Connection."
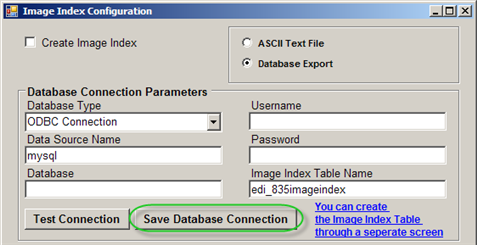
The "Save Database Connection" button
To create the image index table, click on the "You can create the Image Index Table through a separate screen." See Creating the Image Index Table.
Fields to be included in Image Index File
You can select the fields that get imported into the image index by selecting the check-boxes in front of the field names.
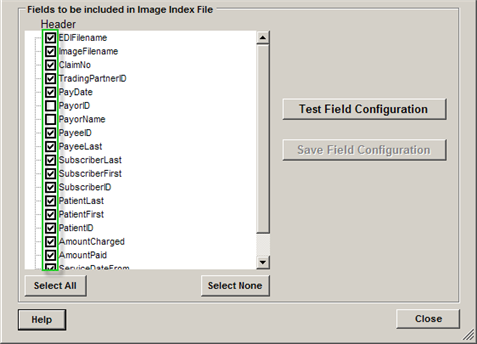
The fields to be included in Image Index File
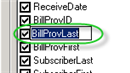
Tip: As with the other field selectors, you can change the field names by clicking on them. This is helpful if you have an existing database that you want to access.
![]()
Changing the field names
For Database export, you can test the fields configuration by clicking on the "Test Field Configuration" button.
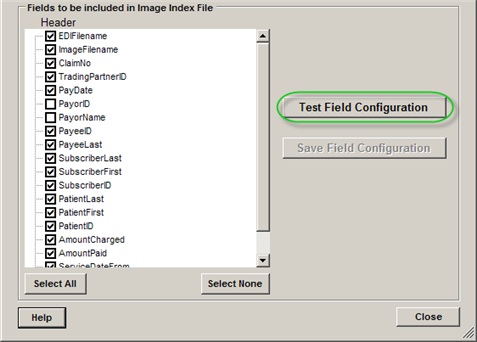
The "Test Field Configuration" button
You will receive a message like this. Click "OK."
The success message
When ready, click on the "Save Field Configuration" button.
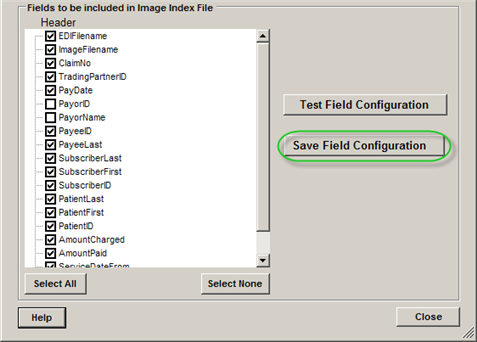
The "Save Field Configuration" button
Once all image index options have been defined and saved, click "Close."
![]()
The "Close" button