|
<< Click to Display Table of Contents >> Code Sets |
  
|
|
<< Click to Display Table of Contents >> Code Sets |
|
EDI relies on transaction code sets. These codes represent longer explanations and descriptions.
At the onset of EDI one of the main design ideas was to make the EDI files as short as possible and to allow different languages to use the same descriptions by reducing long verbose explanations to 2-3 byte long codes. Computer storage was incredibly expensive and making any file larger than it absolutely had to was considered wasteful.
The 999 Master's code sets are stored in the file AckCodesets.xml in the Configuration subdirectory:
Windows XP: C:\Documents and Settings\All Users\Application Data\HIPAAsuite\HIPAA 999 Master\Configuration\
Windows 7, Vista: C:\ProgramData\HIPAAsuite\HIPAA 999 Master\Configuration\
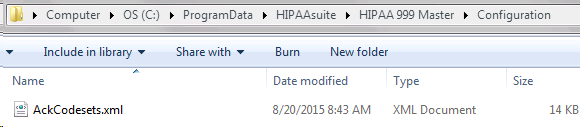
The Configuration folder in Windows 7
Tip: The folder is hidden.
To view/edit transaction code sets in HIPAA Claim Master, follow the instructions below.
| 1. | Go to the "Code Sets" item in the main menu. 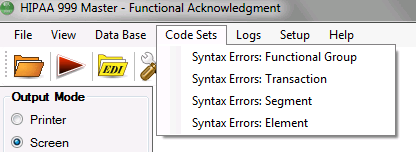 The "Code Sets" menu |
| 2. | From the sub-menu, select a code set name. The following menu items are available via the "Code Sets" menu: |
| • | Syntax Errors: Functional Group |
| • | Syntax Errors: Transaction |
| • | Syntax Errors: Segment |
| • | Syntax Errors: Element |
To select a codeset for display and editing, click on the relevant menu option.
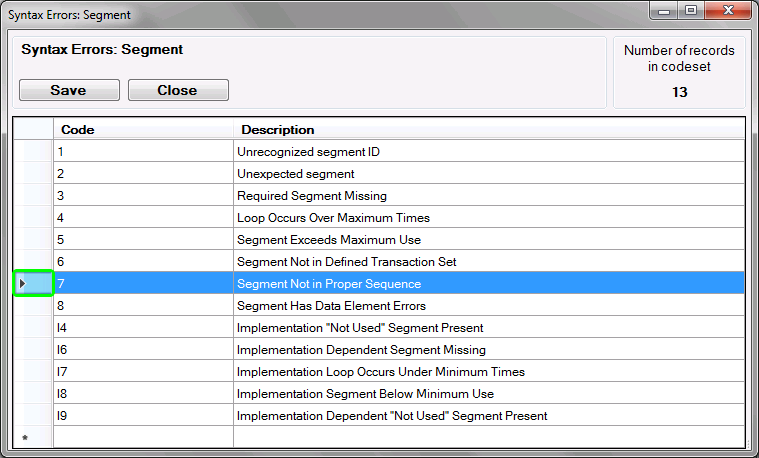
| 3. | The Code Set configuration window will be displayed. You can add, delete or edit codes. 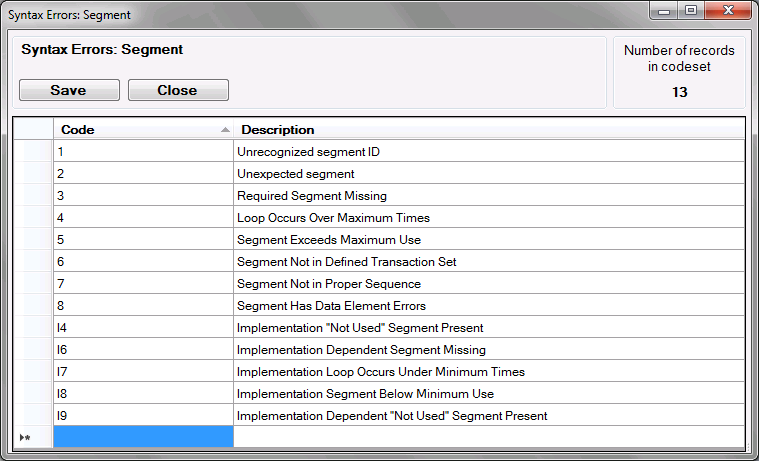 The "Syntax Errors: Segment" codeset configuration window The configuration window provides the following information: |
| • | Number of records in codeset — The total number of codes. For example, for Segment Errors it is equal to 14. |
| • | Codes and their corresponding descriptions. The codes are indicated in the source EDI files. The descriptions are displayed instead of codes in the result easy-to-read files. For example, for Segment Syntax Errors, there are the following codes and corresponding descriptions: |
| • | 1 — Unrecognized segment ID |
| • | 2 — Unexpected segment |
| • | 3 — Required segment missing |
| • | 4 — Loop occurs over maximum times |
| • | etc. |
To add, click on the last row. Now you can see the indicator in the first grey field. Click once more to edit the contents and fill it in, do the same for the description cell. This is now a code row. Leave the row to exit edit mode. Click the "Save" button to store the changes.
Adding a new code-description pair
Note: Only after you leave this row, the changes will take place.
To delete, click the left margin. This action will highlight the whole row.
Highlighting a row by clicking the left margin
Then press the <DELETE> key on your keyboard. Click the "Save" button to store the changes.
To edit, click on the cell to be modified to select it, then click it once more to edit it. Then make your changes. Clicking or moving outside this cell overwrites the cell contents with the new value. To make these changes permanent, click the 'Save' button.
Notice: Don't forget to save the changes by pressing the 'Save' button.