The HIPAA Authorizer displays the EDI document in a page that makes it easy to read the 278 transactions. Sometimes it might be useful to have an image of an authorization record stored for later retrieval. You can create image files containing the data that you see in Screen mode. The following formats are supported:
| • | TIFF |
| • |
No third party software is needed as this feature is integrated into the software.The image file name comes either from the EDI file name or the subscriber's ID which is mandatory and unique within a file.
You can create image files manually or automatically using the command line arguments and Windows Scheduler. Read more in:
Before creating image files, make sure all settings are defined correctly. The following options can be defined:
| • | Put all the images into a single file with multiple pages or have an image file for each authorization record. |
| • | The form or background color. |
| • | The image format, TIFF or PDF. |
| • | The image file directory. In order to avoid having all images in one folder, the images can hashed across folders based on the date. |
Read more in:
Follow the instructions below to create an image file from EDI file.
Notice: The image file will be created based on the pre-defined settings. Read more in Adjusting Image Options.
| 1. | Open an EDI file or directory containing the EDI files in the HIPAA Authorizer.  The "Open" button |
The HIPAA Authorizer can also process each file in a directory and create image files from them. Note: This option is not available for screen display of records. Only database import and image file creation have this option available.
| 2. | 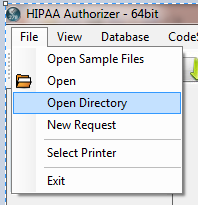 The "Open Directory" menu item. |
| 3. | Select the "Image File" option in the "Output Mode" block.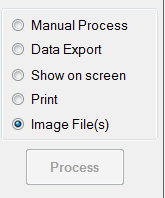 The "Image File" option |
| 4. | Click on the "Run" button in the task bar or the "Process" button in the Side bar.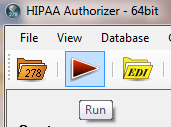 The "Run" buttons |
| 5. | The "Processing Results" window displays the report. You can find the result TIFF or PDF files in the specified folder.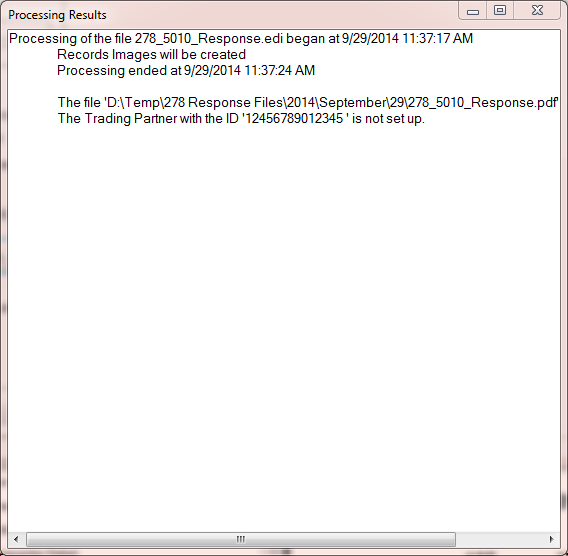 The "Processing Results" window |