|
<< Click to Display Table of Contents >> Creating Image Files from EDI |
  
|
|
<< Click to Display Table of Contents >> Creating Image Files from EDI |
|
The greatest disadvantage of electronic payments is that they are near impossible to be understood in the raw form. Storing an image associated with a payment makes a lot of sense for the most HIPAA Premium Payment Master's users. If you have an investment in a payment imaging system, you can now create images from EDI files and treat them in your imaging system just like scanned images from paper payments. If your staff can understand a payment on a UB04 in a second, why not make it available in this form? Having an image file makes it possible for case workers to call up an image of the payment in seconds.
The HIPAA Premium Payment Master can be used to create image files and PDFs of the EDI payments. Image file creation is a component that can be licensed separately.
The HIPAA Premium Payment Master displays the EDI document in a page that makes it easy to read the 820 transactions.
Note: Earlier versions of the HIPAA Premium Payment Master used a third party image printer driver. This is no longer necessary. The HIPAA Premium Payment Master now has PDF and TIFF capabilities built-in.
Certain parameters of the formats are adjustable.
You can create image files containing the data that you see in Screen mode. You can create image files manually or automatically using the command line arguments and Windows Scheduler. Read more in:
Before creating image files, make sure all settings are defined correctly. Read more in:
Follow the instructions below to create an image file from EDI file.
Notice: The image file will be created based on the pre-defined settings. Read more in Doing Image Setup, Adjusting Image Options.
| 1. | Open an EDI file or directory containing the EDI files in the HIPAA Premium Payment Master. Read more in Processing an EDI File, Processing an Entire Directory. The "Open Document" button 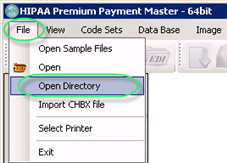 The "Open Directory" menu |
| 2. | Select the "Image File" option in the "Output Mode" block.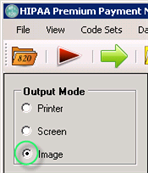 The "Image File" mode |
| 3. | Click on the "Run" button. The "Run" buttons |
| 4. | The "Processing Results" window displays the report. You can find the resulting TIFF or PDF files in the specified folder.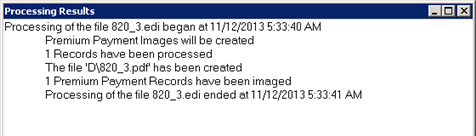 The "Processing Results" window |